Getting Started with FastGPT: Build Your First RAG-Powered AI Assistant in 15 Minutes
Step-by-step tutorial to deploy FastGPT with Docker, configure LLM providers, create a RAG knowledge base, and build a visual AI workflow — all in under 15 minutes.

Setting Up FastGPT: Your First RAG-Powered AI Assistant in 15 Minutes
I remember my first RAG setup — picking embedding models, configuring vector stores, writing ingestion pipelines, debugging token limits. It took me the better part of a weekend. FastGPT changes that entirely. Let me walk you through what I did, and you'll be running your own RAG application before this article is done.
🚀 Ready to run FastGPT?
Get the full Docker Compose config, system requirements, and step-by-step guide.
View FastGPT Tool Page →Before You Start: What You'll Need
- Docker and Docker Compose installed (takes about 2 minutes to verify)
- An LLM API key (OpenAI, DeepSeek, or any provider FastGPT supports)
- About 4GB of free RAM on your machine
- A port that's not already taken (I used 8080)
That's it. No Python environment, no npm installs, no database configuration. FastGPT bundles everything into its Docker image.
Step 1: Spin Up FastGPT
I chose port 8080 because it's what the Docker Compose defaults to, but 3000 or 3001 would work just as well — pick one that's free on your system.
docker pull c121914yu/fastgpt:latest
docker run -d --name fastgpt -p 8080:8080 -v ./fastgpt-data:/data c121914yu/fastgpt:latest
Give it about 30 seconds — grab a coffee. When you see the logs settle, head to http://localhost:8080. If you see a login screen, you're golden. If not, check docker logs fastgpt — 99% of the time it's a port conflict.
Step 2: Configure Your LLM Provider
This is where I wasted 20 minutes the first time — I was looking for a settings cog somewhere in the UI. Turns out, the model config is under the admin panel. Here's the path I took:
- Log in with the default admin credentials (check the startup logs for the auto-generated password)
- Navigate to Settings → Model Providers
- Click Add Provider and select your LLM — I went with DeepSeek since it's fast and cheap
- Paste your API key and hit save
You can add multiple providers here. I added both DeepSeek and OpenAI — FastGPT lets you assign different models to different workflows later. This is where the multi-model support really pays off.
Step 3: Create Your First Knowledge Base
This is the core of FastGPT — the RAG knowledge base. Here's exactly what I did:
- From the dashboard, click Knowledge Base → Create
- Give it a name (I called mine "Product Docs")
- Upload a few documents — I threw in a PDF manual and a couple of Markdown files
- FastGPT auto-chunks and indexes them. You can adjust chunk size and overlap in the settings if you want finer control
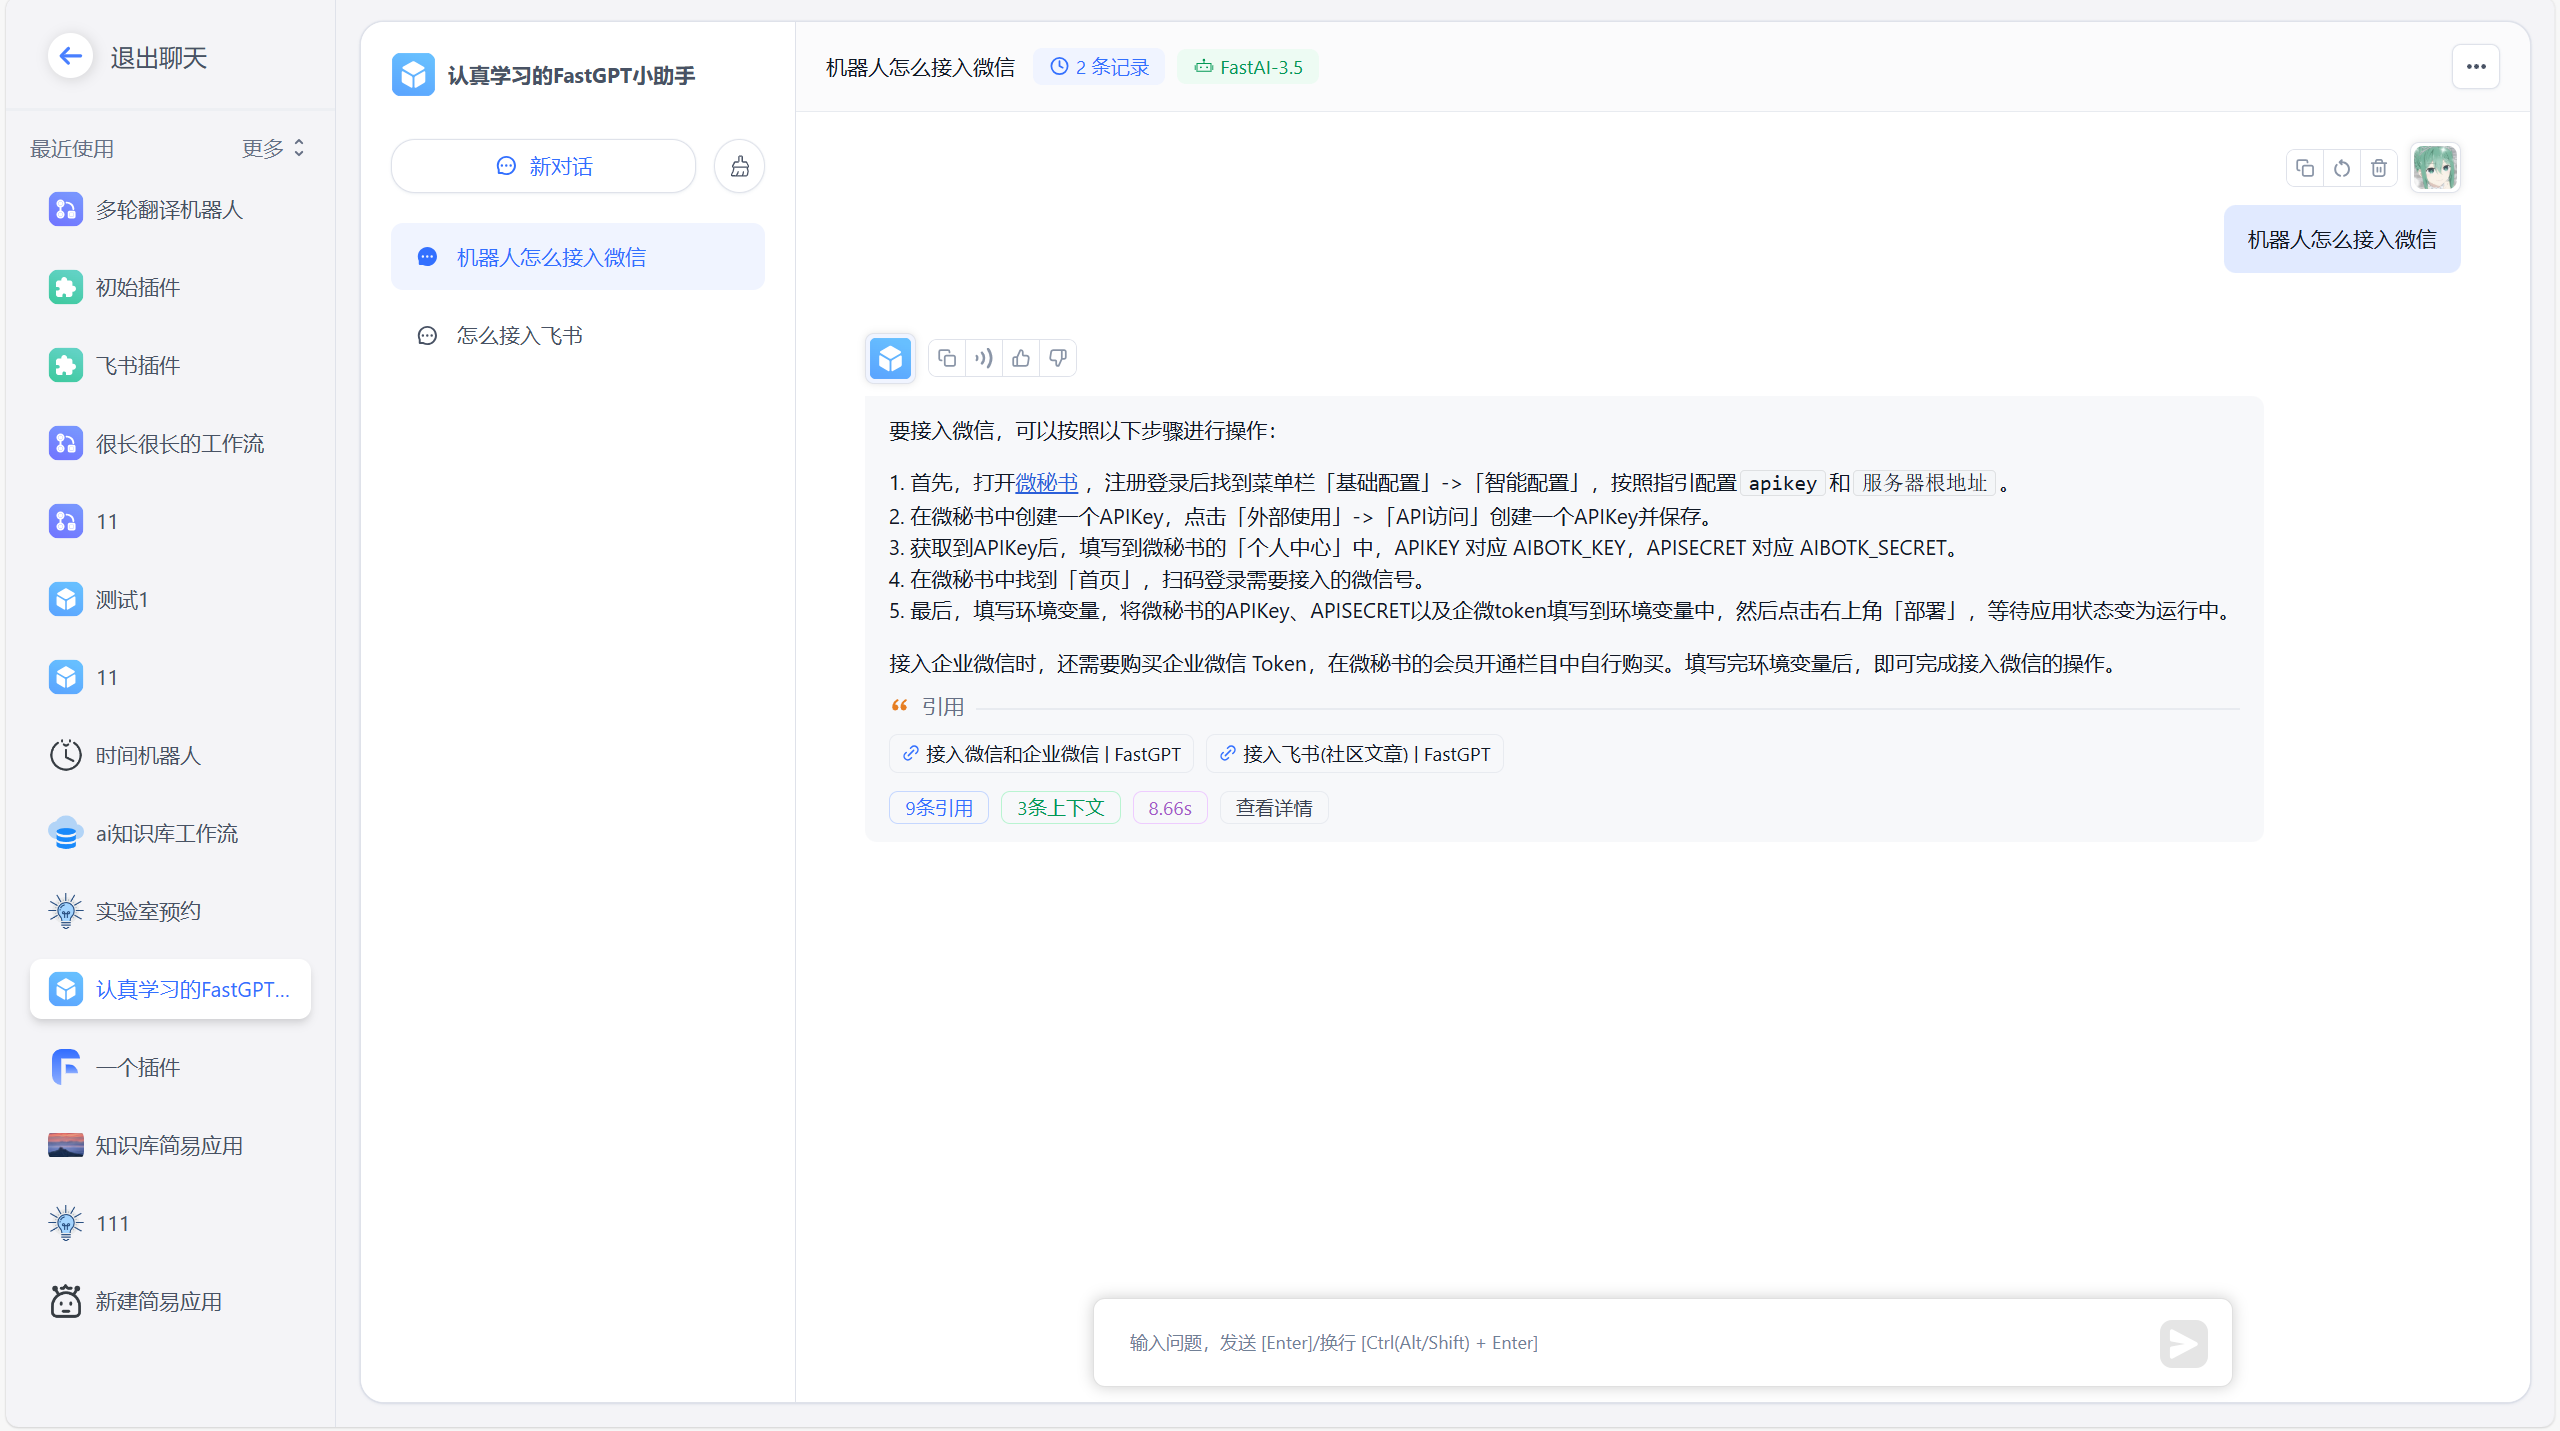
And that's it. Your documents are now searchable via RAG. I tested it by asking a question about the PDF content, and FastGPT returned the relevant chunks with citations. No vector store setup, no embedding model config — it just worked.
Step 4: Build a Simple Workflow
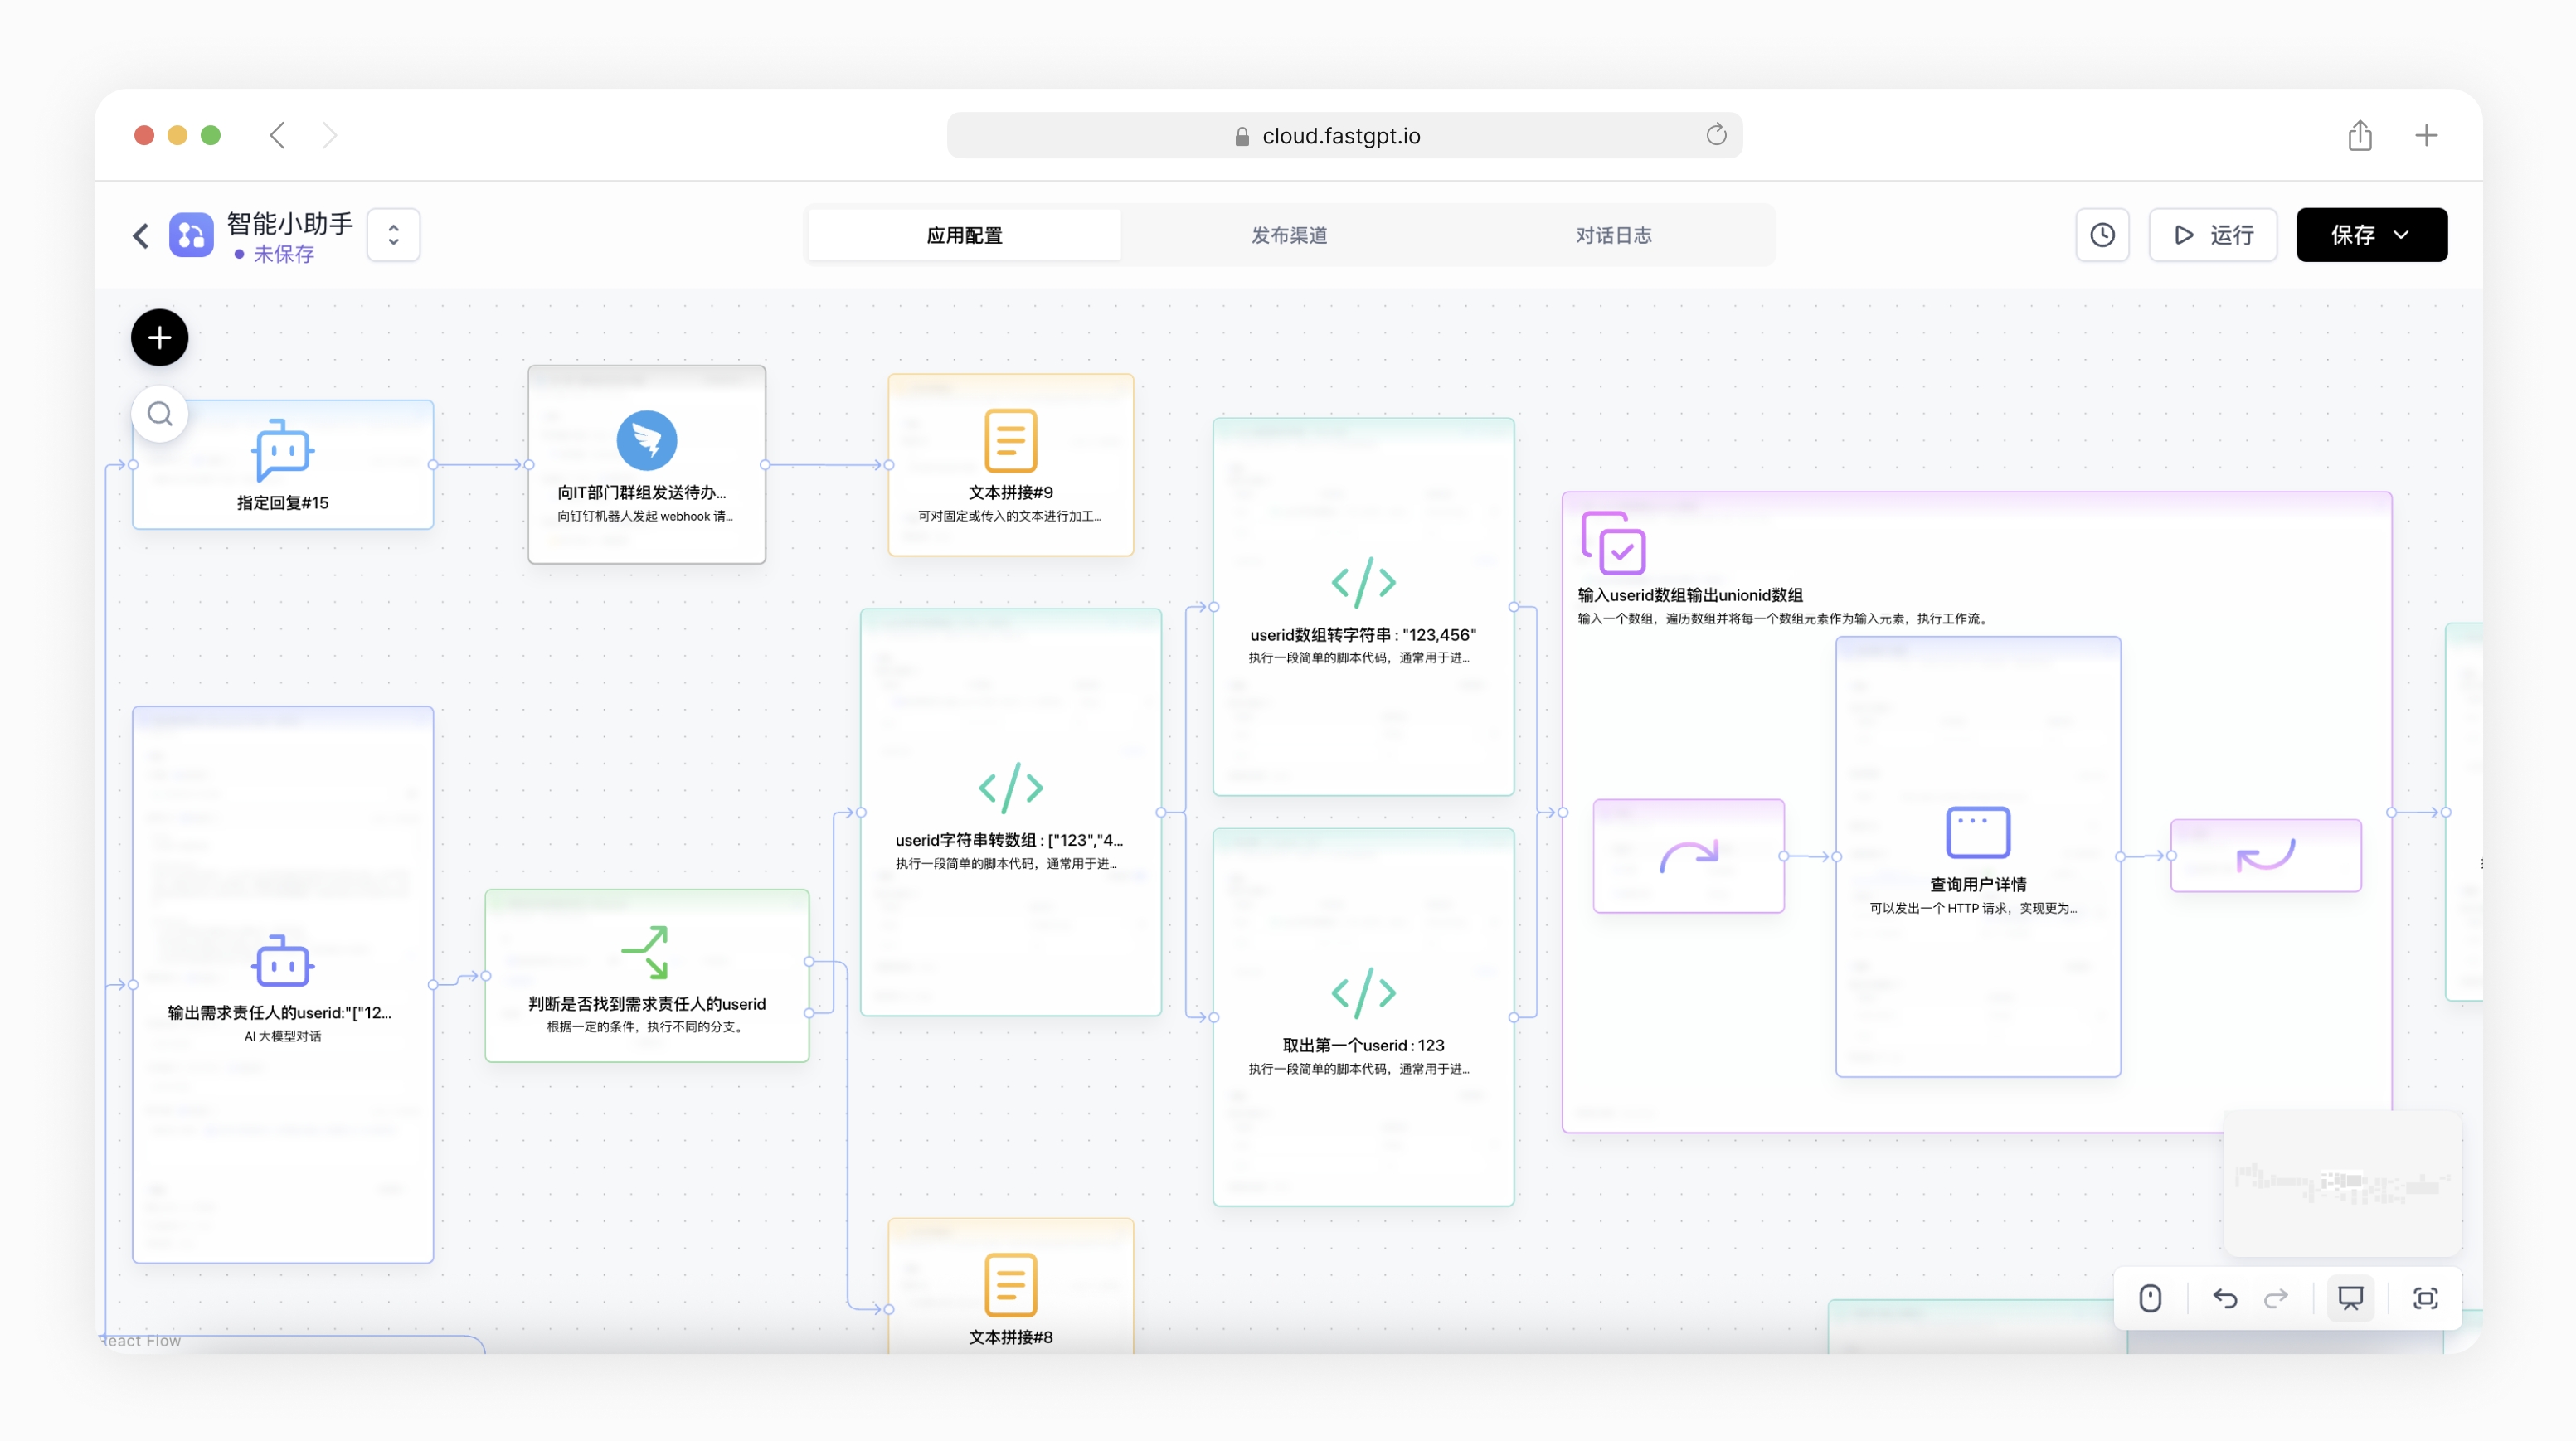
Here's where things get fun. Let's build a document Q&A bot:
- Go to Workflows → Create
- Drag in a User Input node
- Drag in a Knowledge Base Search node and connect it to your "Product Docs" KB
- Drag in an LLM Chat node — set it to use DeepSeek (or whatever you configured)
- Connect: User Input → KB Search → LLM → Output
- Hit Save & Test
The whole thing took me about 5 minutes, including the time I spent admiring how clean the visual editor is. Type a question in the test panel and watch it pull the relevant context from your documents before generating an answer. Beautiful.
A Gotcha I Hit (And How to Avoid It)
First time I set up the workflow, my KB search returned 0 results. I spent 15 minutes debugging. Turned out I hadn't clicked "Index" after uploading the documents — the auto-index only triggers on initial upload, but if you tweak chunk settings afterward, you need to manually re-index. Click the little refresh icon next to the KB name and you're set.
Why This Works for Teams
The multi-user setup is surprisingly smooth. Add team members from the admin panel, assign them to workspaces, and they can build their own workflows on the same knowledge bases. I set up one KB for company policies and another for product documentation, then gave different teams access to different KBs. No duplicated infrastructure, no permission issues.
Final Thoughts
If you're building any application that needs LLM-powered document search, FastGPT will save you days of setup time. It's not trying to replace every framework — it's trying to make the 80% use case dead simple. For that, it's succeeded brilliantly. Pair it with Docker on Run This Ai and you're looking at a deployment that takes 2 commands and 15 minutes to go from zero to fully operational.
🚀 Deploy FastGPT on Run This Ai
Docker Compose configs, system requirements, installation guides, and more — all in one place.
View FastGPT Tool Page →