Getting Started with Uptime Kuma: Docker Setup and Configuration Guide
Step-by-step guide to deploying Uptime Kuma with Docker, configuring monitors, setting up notifications, and creating a public status page.
Introduction
Uptime Kuma is one of the easiest self-hosted monitoring tools to deploy. In this tutorial, you will learn how to set up Uptime Kuma with Docker, configure your first monitors, set up notifications, and create a public status page - all in under 10 minutes.
Prerequisites
- A server with Docker and Docker Compose installed (any Linux distribution, macOS, or Windows with WSL2)
- At least 256MB of RAM and 1GB of disk space
- Port 8080 available on your host (or change the port mapping)
Step 1: Deploy with Docker
The quickest way to get started is with a single Docker command:
docker run -d --name uptime-kuma \
  -p 8080:8080 \
  -v ./uptime-kuma-data:/app/data \
  --restart unless-stopped \
  louislam/uptime-kuma:latest
This pulls the latest image, maps port 8080, creates a persistent volume for your data, and configures auto-restart. The entire setup takes about 30 seconds.
Step 2: Initial Setup
Open your browser and navigate to http://YOUR_SERVER_IP:8080. You will be greeted by the setup wizard:
- Create an admin account with your email and a strong password
- Set the default notification language
- Configure your first monitor (see Step 3)
Step 3: Creating Your First Monitor
Click "Add New Monitor" and configure:
- Monitor Type: HTTP(s) for websites, TCP Port for services, Ping for network devices
- URL or Host: The endpoint you want to monitor (e.g., https://example.com)
- Friendly Name: A human-readable label
- Check Interval: How often to check (default: 60 seconds, minimum: 20 seconds)
- Retries: Number of failed checks before marking as down (default: 0)
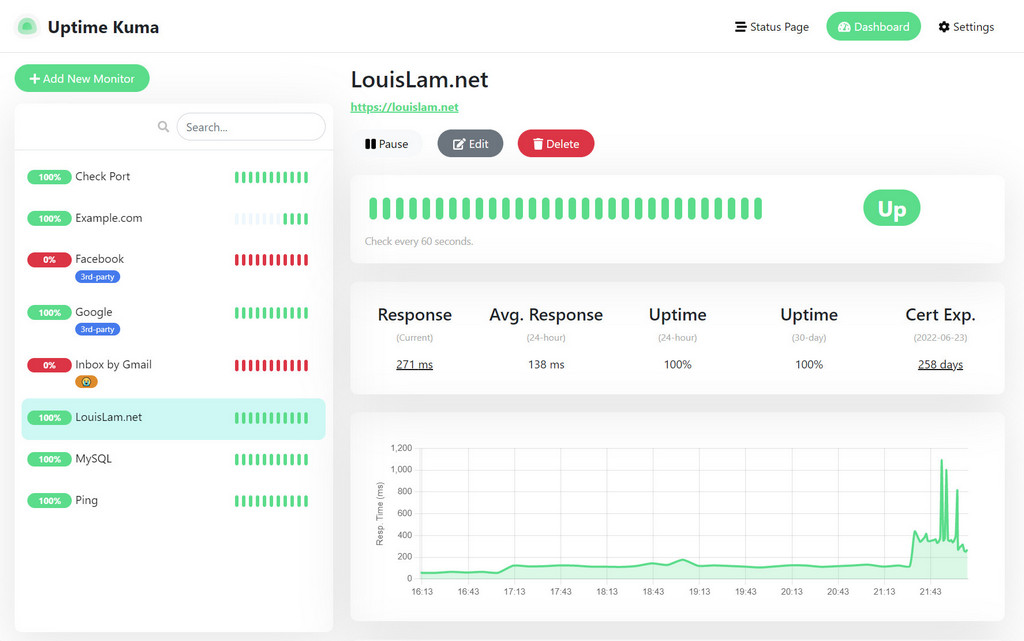
Save the monitor and you will see live status updates on your dashboard within seconds.
Step 4: Setting Up Notifications
Go to Settings > Notification and click "Add Notification":
- Choose your provider (Telegram, Discord, Slack, Email, Signal, Pushover, etc.)
- Enter the required credentials (bot token, webhook URL, API keys)
- Test the notification to confirm it works
- Assign the notification to specific monitors or all monitors
Step 5: Create a Public Status Page
Navigate to Settings > Status Page and click "Add Status Page":
- Give your status page a title (e.g., "My Services Status")
- Select which monitors to display publicly
- Customize the appearance with your logo and brand colors
- Optionally configure a custom domain with SSL
- Publish the page and share the URL with your users
Docker Compose Setup (Production)
For a more robust setup, use Docker Compose:
version: "3.8"
services:
  uptime-kuma:
    image: louislam/uptime-kuma:latest
    restart: unless-stopped
    ports:
      - 8080:8080
    volumes:
      - ./data/uptime-kuma:/app/data
Save as docker-compose.yml and run docker compose up -d.
Conclusion
You now have a fully functional self-hosted monitoring system running in minutes. Uptime Kuma handles everything from basic uptime checks to SSL monitoring and public status pages. With its Docker-first design, maintaining and upgrading is as simple as pulling the latest image and restarting the container.