How to Publish Xiaohongshu Notes from Claude Desktop, Cursor and VS Code
Step-by-step tutorial: connect xiaohongshu-mcp to Cursor, VS Code and Claude Desktop, verify your session, search notes and publish Xiaohongshu posts with AI.
🚀 Want to deploy xiaohongshu-mcp yourself?
Docker configs, system requirements, and installation guides — all on one page.
View xiaohongshu-mcp Tool Page →From zero to published: a hands-on walkthrough
In this tutorial we connect the xiaohongshu-mcp server to three popular clients — Claude Desktop, Cursor, and VS Code — and publish a real Xiaohongshu note with AI assistance. All configuration examples are included in the repository's docs folder.
Step 1: Add the MCP server to Cursor
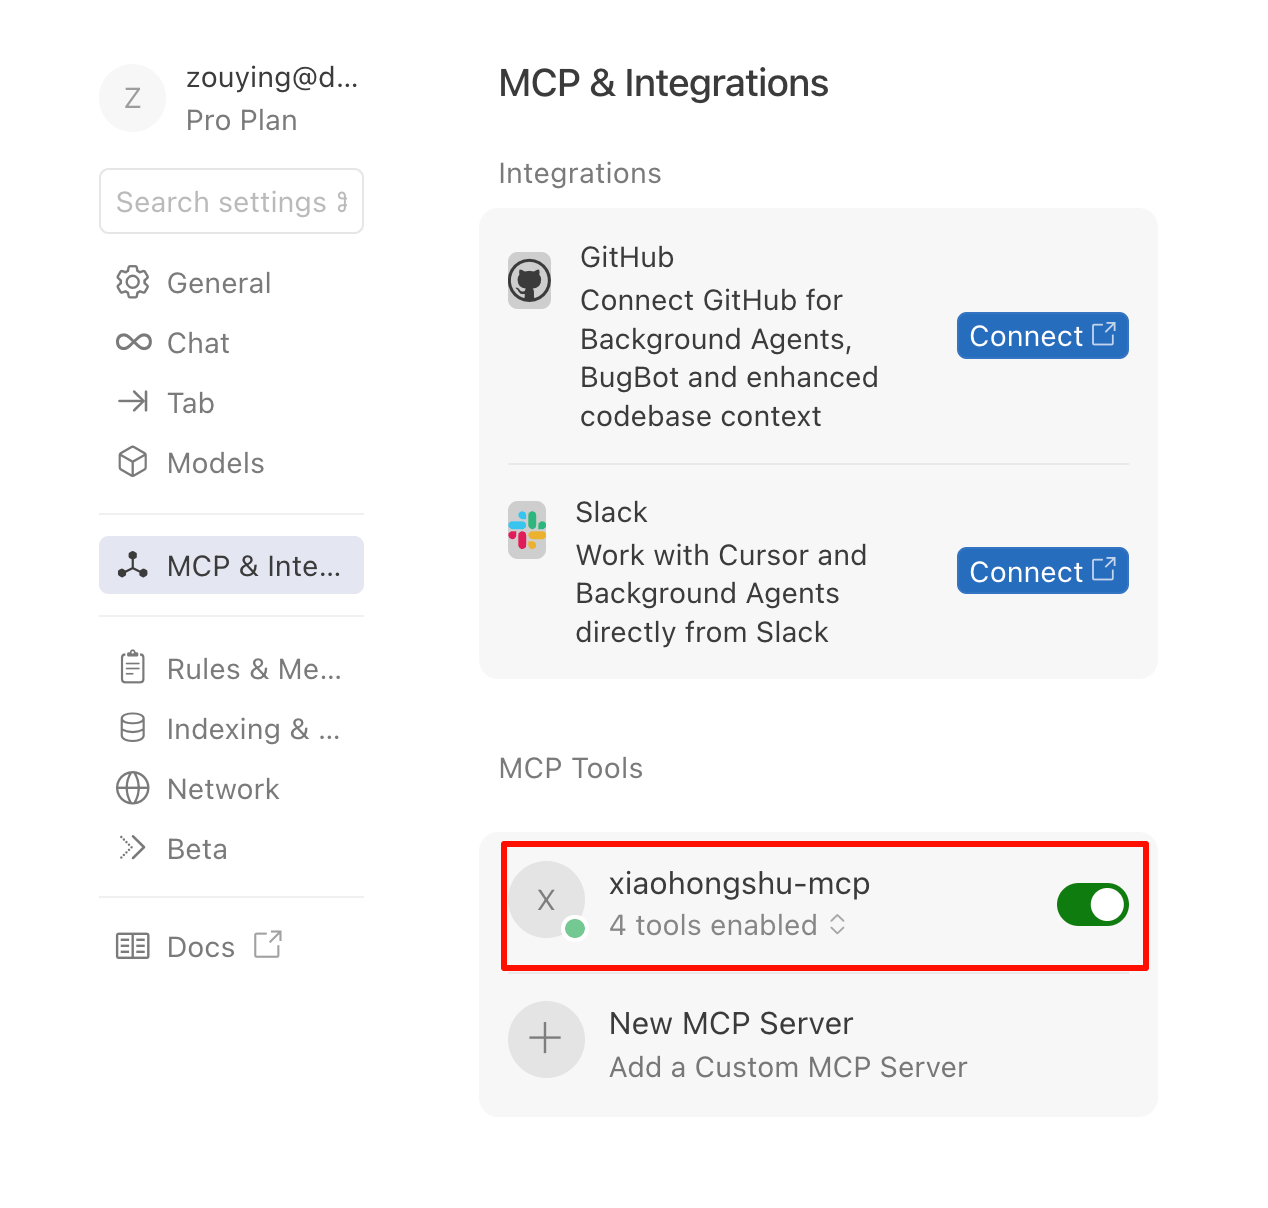
Open Cursor's MCP settings and add a new server pointing at xpzouying/xiaohongshu-mcp:latest. The project provides a ready-made .cursor/mcp.json example, so you can copy it straight into your project:
Step 2: Verify your session
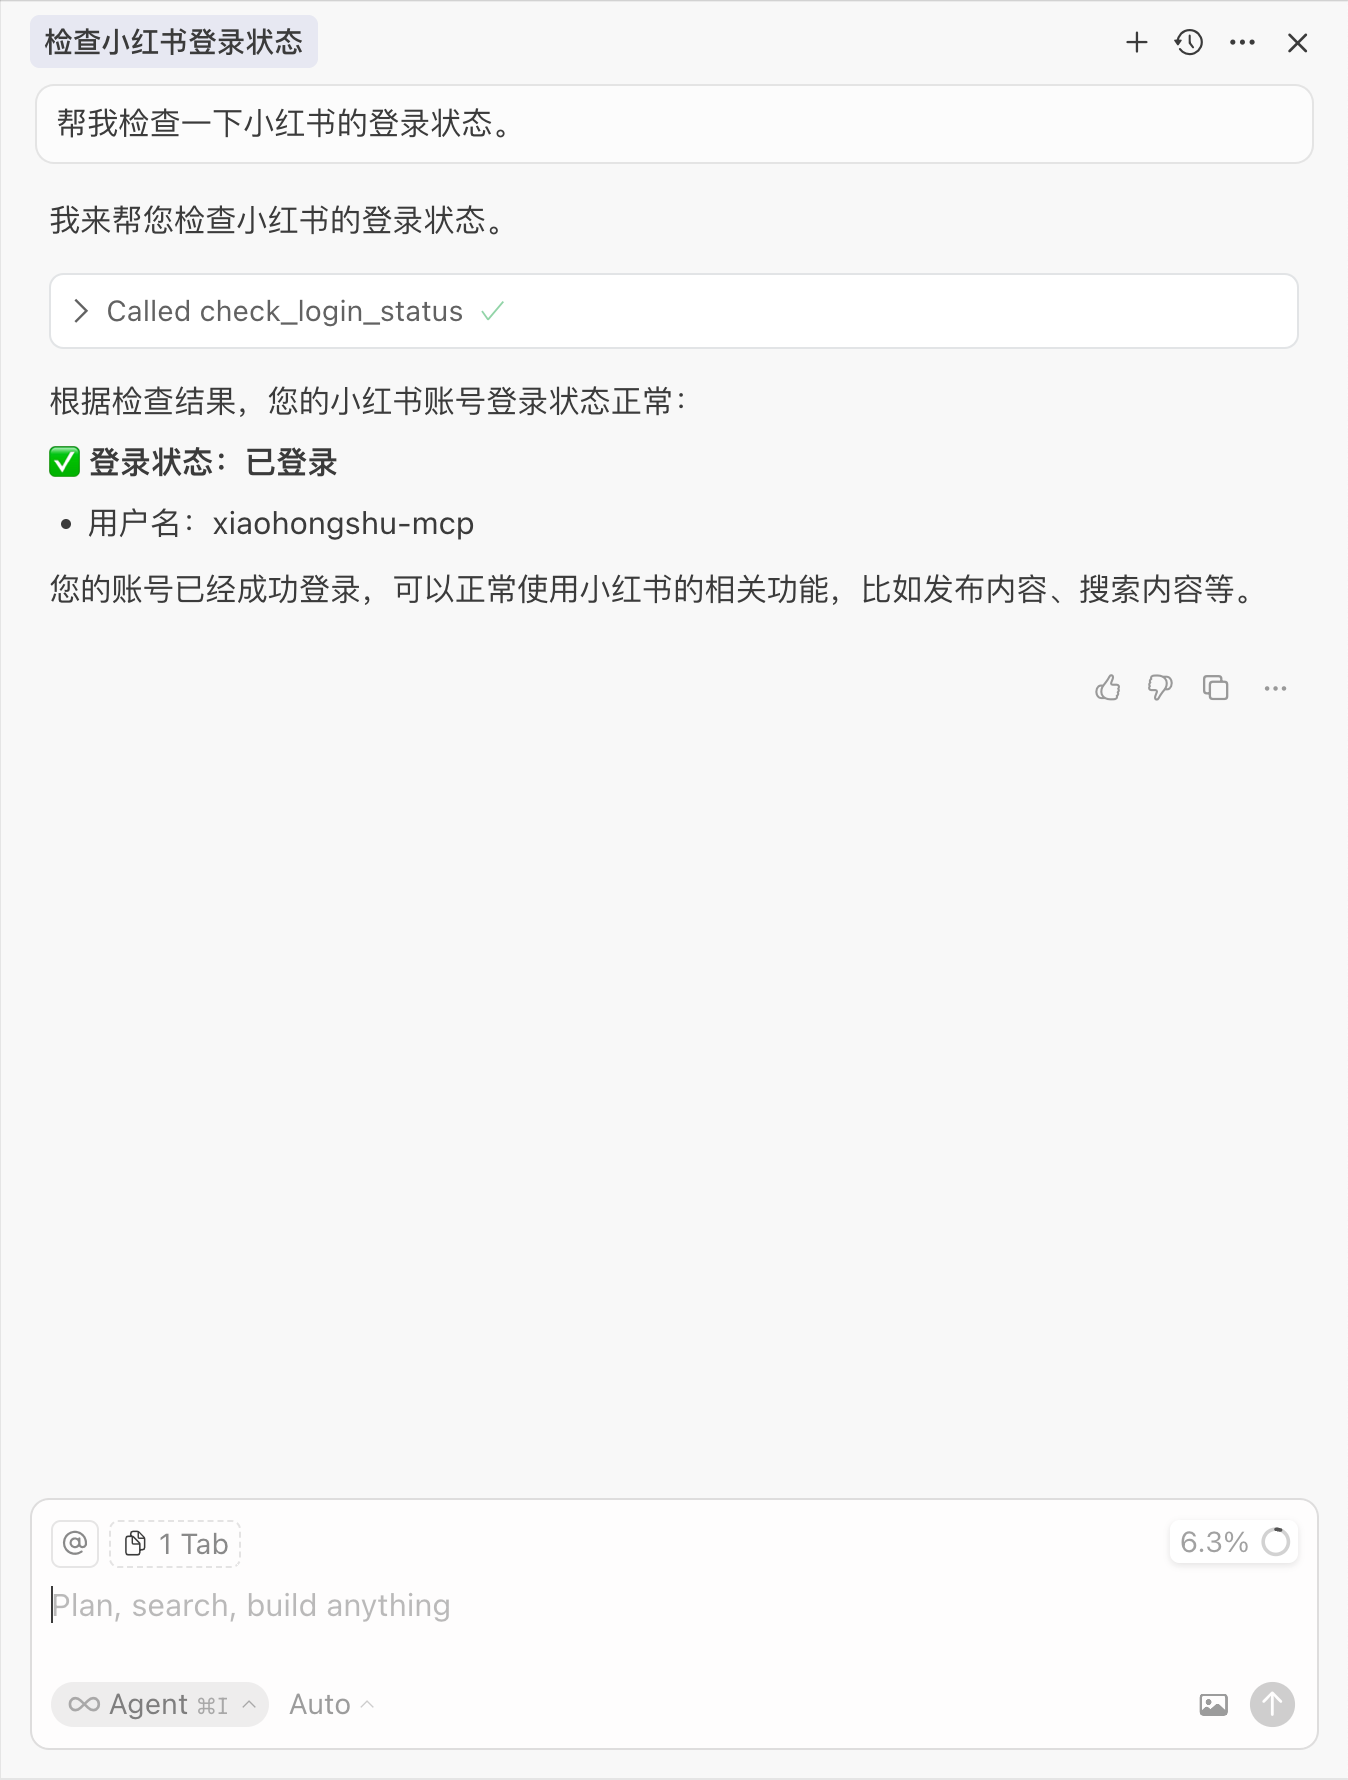
Before searching or publishing, run the check-login tool. It confirms your cookies are valid and tells you when re-authentication is needed:
Step 3: Search and inspect content
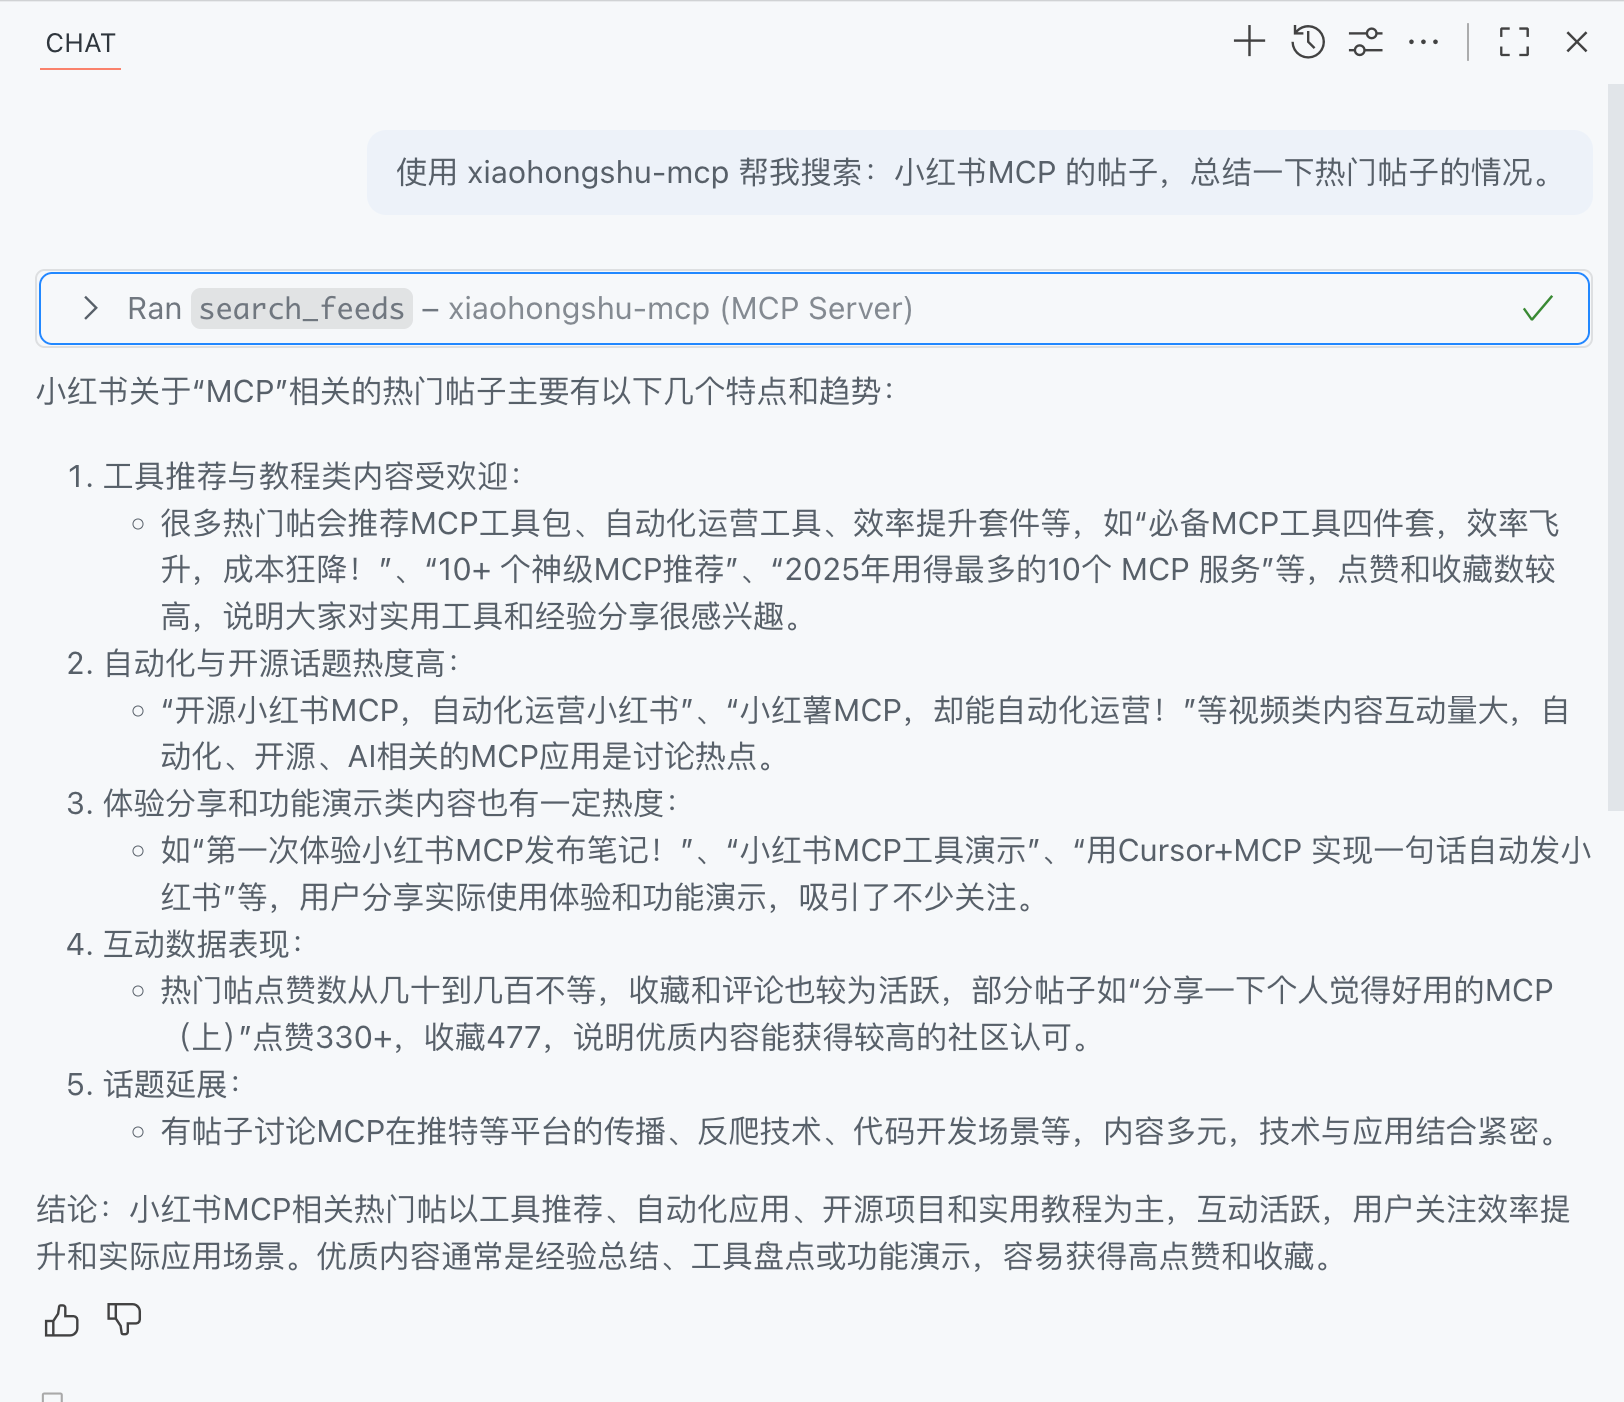
Once connected, ask your assistant to search for notes on any topic. Results come back as structured data you can inspect, quote, or reuse. In VS Code the experience is identical thanks to the shared MCP protocol:
Step 4: Publish a note
Finally, hand the draft to the publish tool. The server takes care of the upload and returns a confirmation with the result:

Review
The whole loop — search, fetch, publish — runs without leaving your editor. The project is actively maintained, well documented, and the Docker image is production-usable. If you work with Xiaohongshu content and use AI tools daily, this server is a must-have addition to your stack.
🚀 Ready to run xiaohongshu-mcp?
Docker configs, system requirements, and installation guides — all on one page.
View xiaohongshu-mcp Tool Page →