Getting Started with Astron RPA: Deploy and Build Your First Automation Workflow
Step-by-step guide to deploying Astron RPA with Docker, installing the Windows client, and building your first automation workflow with the visual designer.
Prerequisites
Before you begin, make sure you have:
- A server running Docker (any Linux distribution with Docker Engine 20+)
- At least 8 GB RAM and 4 CPU cores recommended
- A Windows 10/11 machine for the desktop client (optional but recommended)
gitinstalled on your server
Step 1: Deploy Astron RPA Server with Docker
The fastest way to get started is using Docker Compose. Clone the repository and follow these steps:
# Clone the repository
git clone https://github.com/iflytek/astron-rpa.git
cd astron-rpa/docker

# Copy the environment template
cp .env.example .env

# Configure your external endpoint (IMPORTANT)
# Edit .env and set:
# CASDOOR_EXTERNAL_ENDPOINT="http://YOUR_SERVER_IP:8000"

# Start all services
docker compose up -d
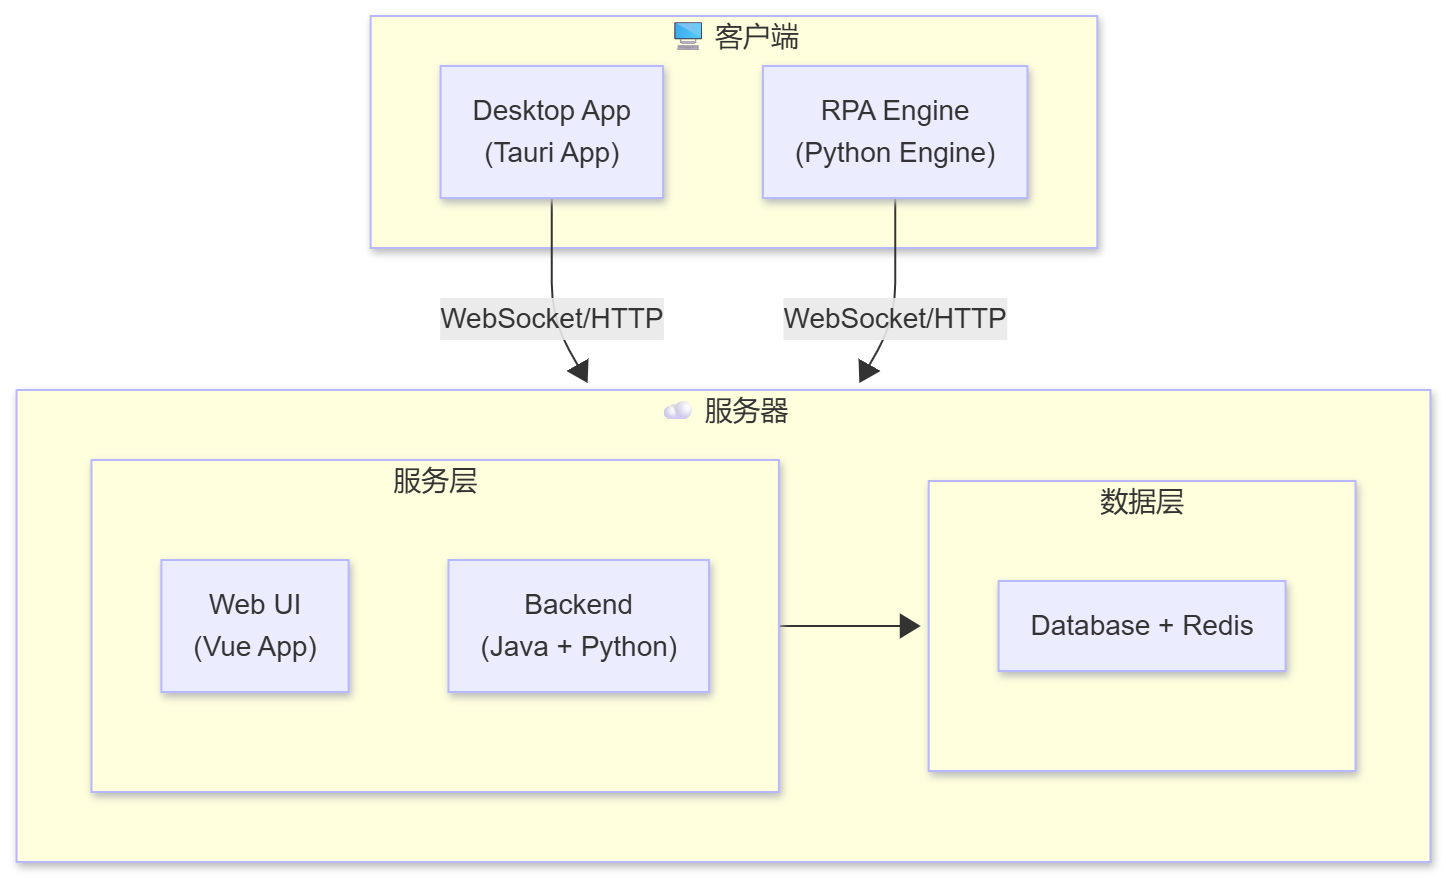
This will start MySQL, the Atlas migration tool, and the Astron RPA server. You can check the status with:
docker compose ps
Step 2: Verify the Deployment
Once all services are running, test the deployment:
# Check the API health endpoint
curl http://YOUR_SERVER_IP:32742/api/rpa-auth/user/login-check
If you see {"code":"900001","data":null,"message":"unauthorized"}, the deployment is working correctly! Now open http://YOUR_SERVER_IP:8000 in your browser — you should see the Casdoor login page.
🚀 Want to deploy Astron RPA yourself?
Docker configs, system requirements, and installation guides — all on one page.
View Astron RPA Tool Page →Step 3: Install the Windows Client
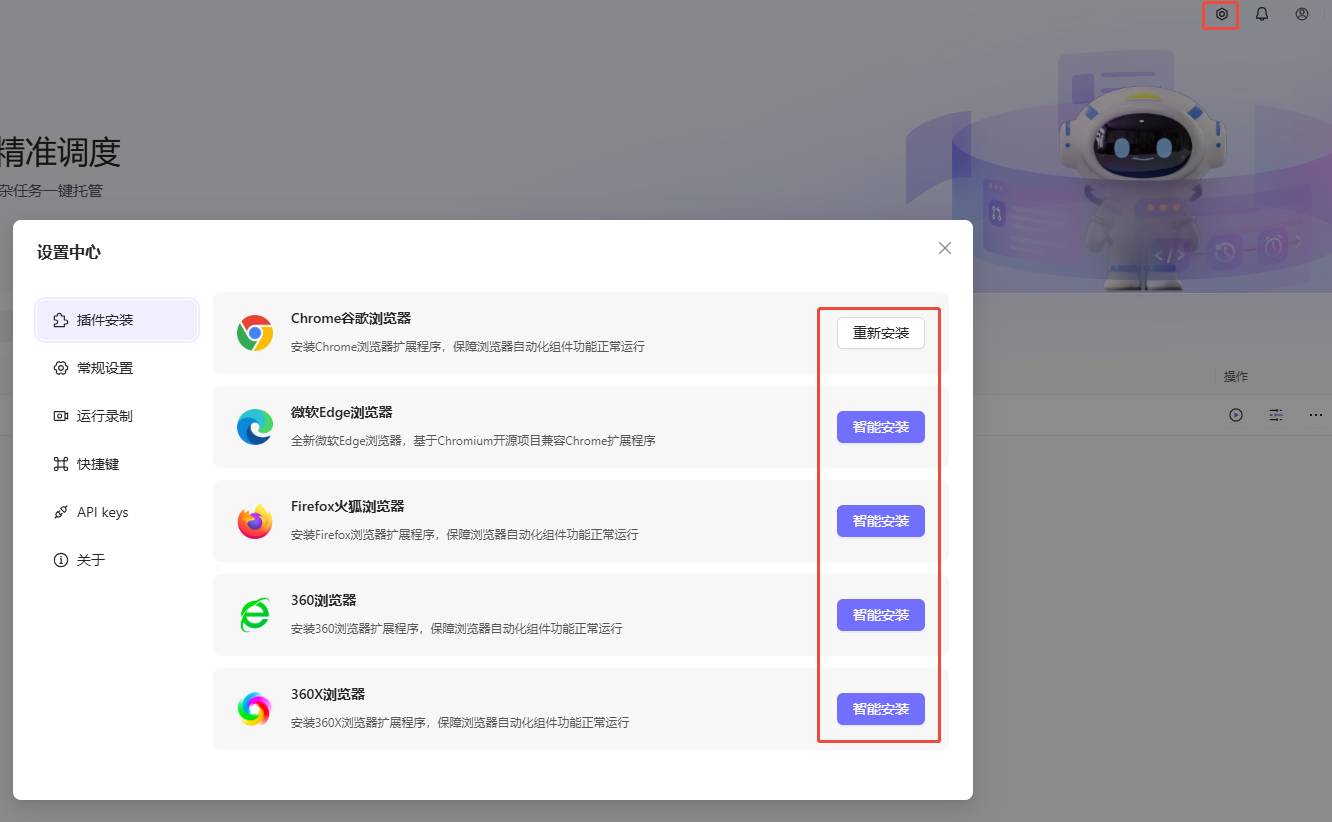
For creating and running automation workflows, install the Astron RPA desktop client on a Windows machine:
- Binary installer: Download the latest release from the GitHub releases page
- Source build: Follow the BUILD_GUIDE.md in the repository
Step 4: Build Your First Automation Workflow
- Log in to the Astron RPA client using the Casdoor credentials you set up
- Create a new workflow using the visual designer — drag components from the palette onto the canvas
- Configure triggers: Choose from direct execution, scheduled tasks, or API calls
- Test and debug: Use the built-in debugger to step through your workflow
- Deploy: Set the workflow to run on the server with your chosen trigger
Step 5: Connect AI Agents (Optional)
If you want AI-driven automation, set up Astron Agent alongside your RPA deployment. The two platforms communicate natively, allowing your AI agent to call RPA workflows and vice versa.
Troubleshooting
| Issue | Solution |
|---|---|
| Docker services won't start | Check your .env file — ensure DATABASE_PASSWORD is set and CASDOOR_EXTERNAL_ENDPOINT points to your server IP |
| Login page not loading | Make sure port 8000 is open in your firewall, and Casdoor is correctly configured |
| Client can't connect to server | Verify the server URL in the client configuration — use HTTP, not HTTPS, for initial setup |
🚀 Want to deploy Astron RPA yourself?
Docker configs, system requirements, and installation guides — all on one page.
View Astron RPA Tool Page →