Getting Started with Beszel: Docker Installation Guide
A complete step-by-step guide to installing and configuring Beszel for server monitoring with Docker. Deploy the hub, install agents, configure alerts, and start monitoring in under 5 minutes.

Quick Start: Monitoring Your Servers in 5 Minutes
Beszel makes it incredibly easy to monitor your servers, Docker containers, and infrastructure with minimal effort. This guide will walk you through setting up Beszel on your own hardware using Docker Compose — no complex configuration required.
Prerequisites
- A server with Docker and Docker Compose installed
- At least 256MB RAM and 1 CPU core (512MB+ recommended)
- Port 8080 available for the web interface
- A Linux host (or any system that can run Docker agents)
Step 1: Deploy the Beszel Hub
The hub is the central web application where you view all your metrics and manage your systems. Deploy it with a simple docker-compose.yml:
services:
  beszel:
    image: henrygd/beszel:latest
    restart: unless-stopped
    ports:
      - 8080:8080
    volumes:
      - ./data/beszel:/data
Save this as docker-compose.yml and run:
docker compose up -dYour Beszel hub is now running at http://YOUR_SERVER_IP:8080. Open it in your browser, create an admin account, and you are ready to add systems.
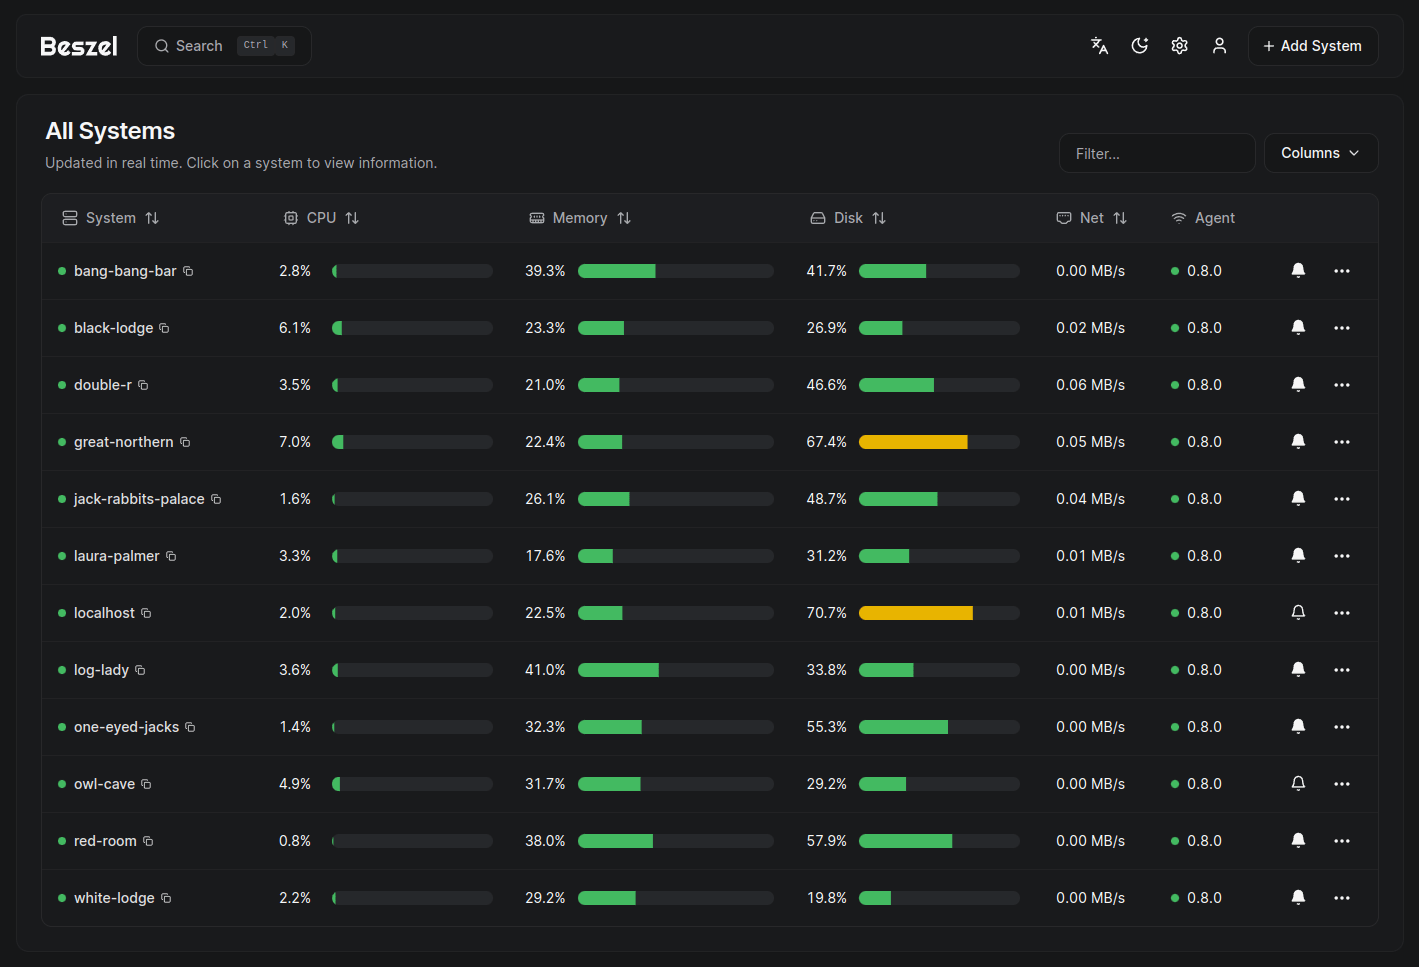
Step 2: Understanding the Architecture
Beszel uses a hub-and-agent architecture:
- The Hub (what you just deployed) — provides the web dashboard, stores metrics, manages users, and sends alerts. One hub can monitor many systems.
- The Agent — a tiny binary (< 20MB RAM) installed on each machine you want to monitor. It collects system metrics and container stats, then sends them to the hub.
The agent communicates with the hub over HTTP. No public internet exposure is needed — the agent can be on the same LAN, a different VPC, or even across the internet with a simple firewall rule.
Step 3: Install Agents
To add a new system to monitor:
- In the Beszel web UI, navigate to Systems → Add System
- You will get a one-line command that looks like:
curl -sL https://raw.githubusercontent.com/henrygd/beszel/main/supplemental/install-agent.sh | sh -s -- -k YOUR_KEY -h http://HUB_IP:8080 - Run that command on the machine you want to monitor
- Within seconds, the agent will appear in your dashboard with live metrics
That is it! The agent auto-registers and starts sending data immediately. You can monitor as many systems as you want — each one just needs the agent installed.

Step 4: Configure Alerts
Beszel supports flexible alerting to keep you informed when things go wrong. To set up alerts:
- Go to Settings → Notifications in the web UI
- Choose a notification channel (Discord, Telegram, Slack, email, ntfy, Pushover, and many more)
- Enter your webhook URL or API credentials
- On each system, configure thresholds for CPU, memory, disk, bandwidth, or temperature
- Beszel will notify you when a threshold is breached
Additional Features Worth Exploring
Multi-User Access
If you manage infrastructure for a team, create additional user accounts. Each user can manage their own set of systems, while admins can share systems across all users. OAuth/OIDC integration with Google, GitHub, or any OpenID provider streamlines login.
Automatic Backups
Configure automatic backups to save your historical monitoring data to disk or S3-compatible storage. This is essential for long-term trend analysis and disaster recovery.
GPU Monitoring
If your servers have NVIDIA, AMD, or Intel GPUs, Beszel can track GPU usage, temperature, and power draw — perfect for AI/ML workloads and rendering servers.
Docker Container Stats
One of Beszel's standout features is its ability to track per-container CPU, memory, and network usage for every Docker or Podman container on your host. This gives you granular visibility into which containers are consuming resources, without needing to SSH into each server and run docker stats.
Conclusion
Setting up Beszel takes just a few minutes, yet provides enterprise-grade monitoring for your entire infrastructure. It is lightweight enough for a Raspberry Pi homelab and powerful enough for production servers. The combination of Docker stats, configurable alerts, multi-user support, and a beautiful web interface makes Beszel one of the best self-hosted monitoring solutions available today.
For more detailed instructions, visit the Beszel documentation or check out the GitHub repository.