How to Deploy text-generation-webui with Docker on Your Own Server
Step-by-step Docker deployment guide for text-generation-webui (oobabooga) — run local LLMs with GPU support in a containerized environment.
Why Run text-generation-webui in Docker?
Running text-generation-webui (oobabooga) in Docker gives you a clean, isolated environment with all dependencies pre-configured. No need to worry about Python versions, CUDA toolkits, or conflicting packages. Docker makes deployment reproducible across Linux, cloud VPS, and even Windows via WSL2.
Prerequisites
- Docker and Docker Compose installed (v24+)
- At least 8GB RAM (16GB+ recommended for 13B+ models)
- A GPU with CUDA support (optional but strongly recommended)
- NVIDIA Container Toolkit if using GPU acceleration
Deploy with Docker Compose
Create a docker-compose.yml file:
services:
  text-generation-webui:
    image: atinoda/text-generation-webui:latest
    restart: unless-stopped
    ports:
      - 8080:8080
    volumes:
      - ./data/text-generation-webui:/data
    environment:
      - NVIDIA_VISIBLE_DEVICES=all  # For GPU passthrough
Pull and Run
docker pull atinoda/text-generation-webui:latest
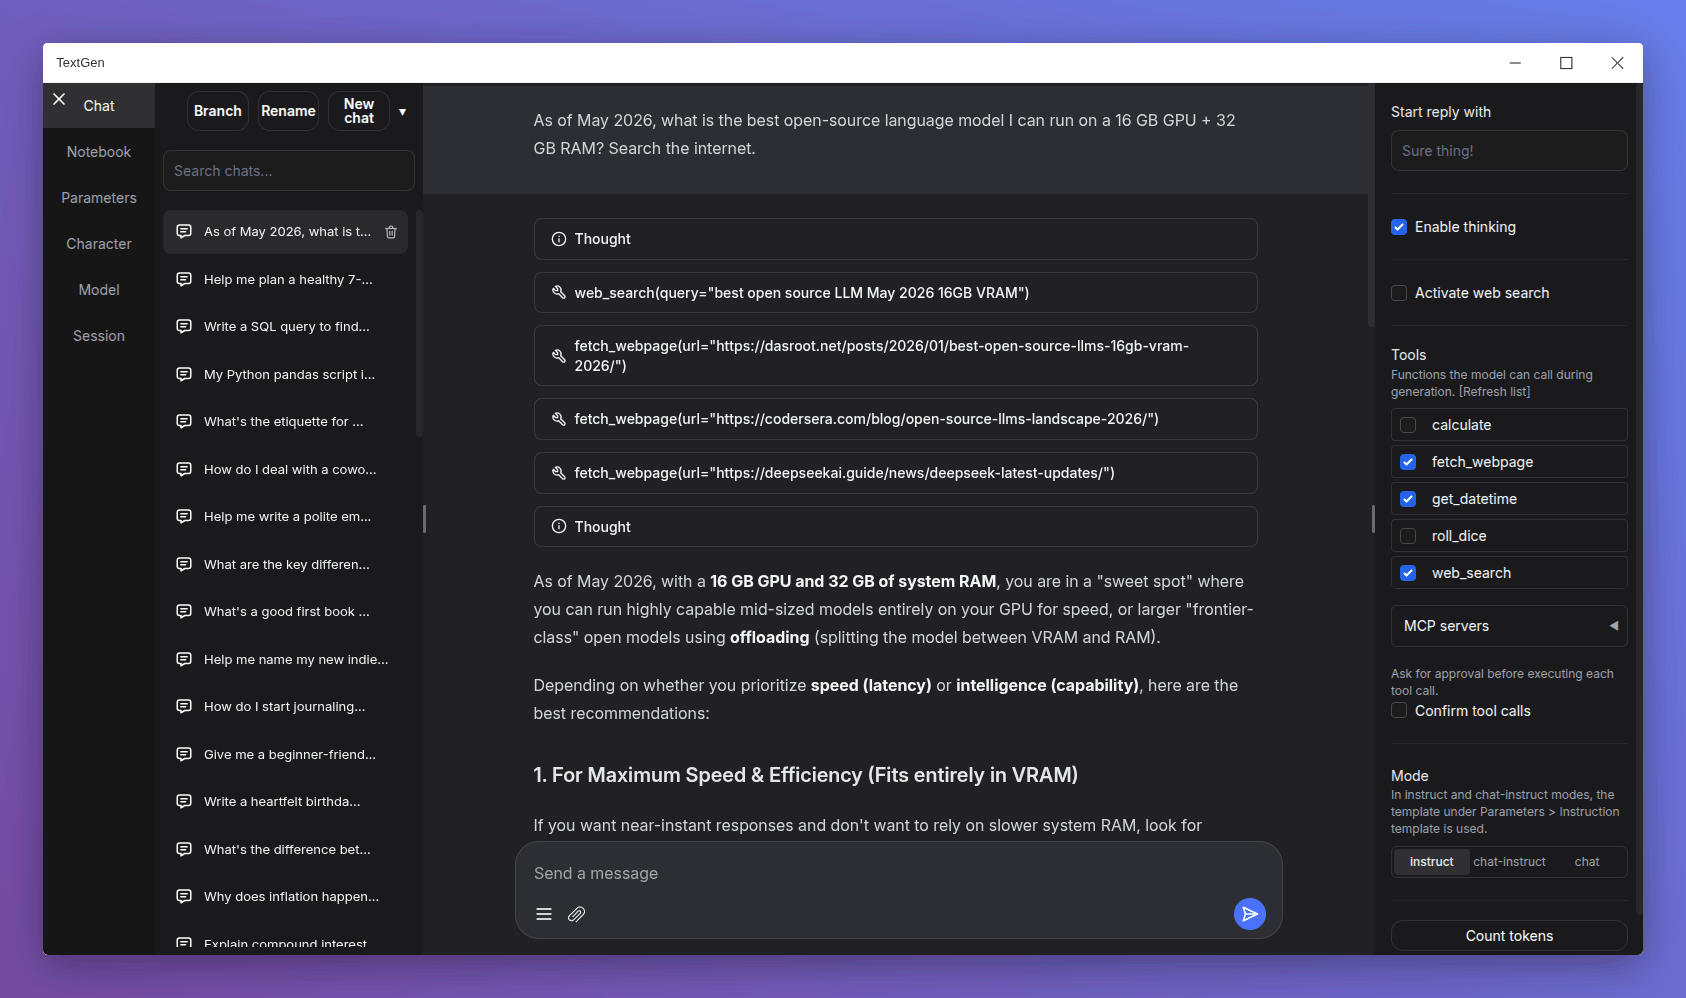
docker compose up -dOnce running, open http://localhost:8080 in your browser. Navigate to the Model tab to download and load your first LLM — models like Llama 3.1 8B, Mistral 7B, or Phi-3 Mini work great.
GPU Acceleration
For NVIDIA GPU support, install the NVIDIA Container Toolkit and add deploy: GPU resources to your compose file. The Docker image at atinoda/text-generation-webui includes pre-built CUDA kernels for maximum performance.
Persisting Models and Data
The volume mount ./data/text-generation-webui:/data stores your downloaded models, chat histories, and fine-tuned adapters. Keep this directory backed up — models can be tens of gigabytes.
Tips for Production
- Set up a reverse proxy (Nginx/Caddy) with SSL for remote access
- Enable the OpenAI-compatible API for integrating with other tools
- Use the extensions system to add TTS, image generation, or memory capabilities